Styling the Photo Perfect Home


When I started writing this post, the original name was ‘how to know when a room is finished’. After thinking about it I reconsidered because I knew the room wasn’t ‘finished’ and parts of it look half done and needed some styling. Then I went down the creative rabbit hole of, “Well, Susan, how do you know it’s half done, or not finished.” It boiled down to my experience behind the camera. As a photographer, it’s easy for me to see when something is half baked a.k.a. not finished. I’m critical of my own home cause if I try to Instagram a quick pic, it’s not right and bugs me! If you want a photo perfect home, read below.
Because I love lists and process so much, I thought it would be best to really break it down step-by-step. I also like to break out the tactical and creative too. These two opposite styles of thinking compliment each other and go hand in hand. You’ll get the idea as you follow along.
Step One: Snap and Analyze
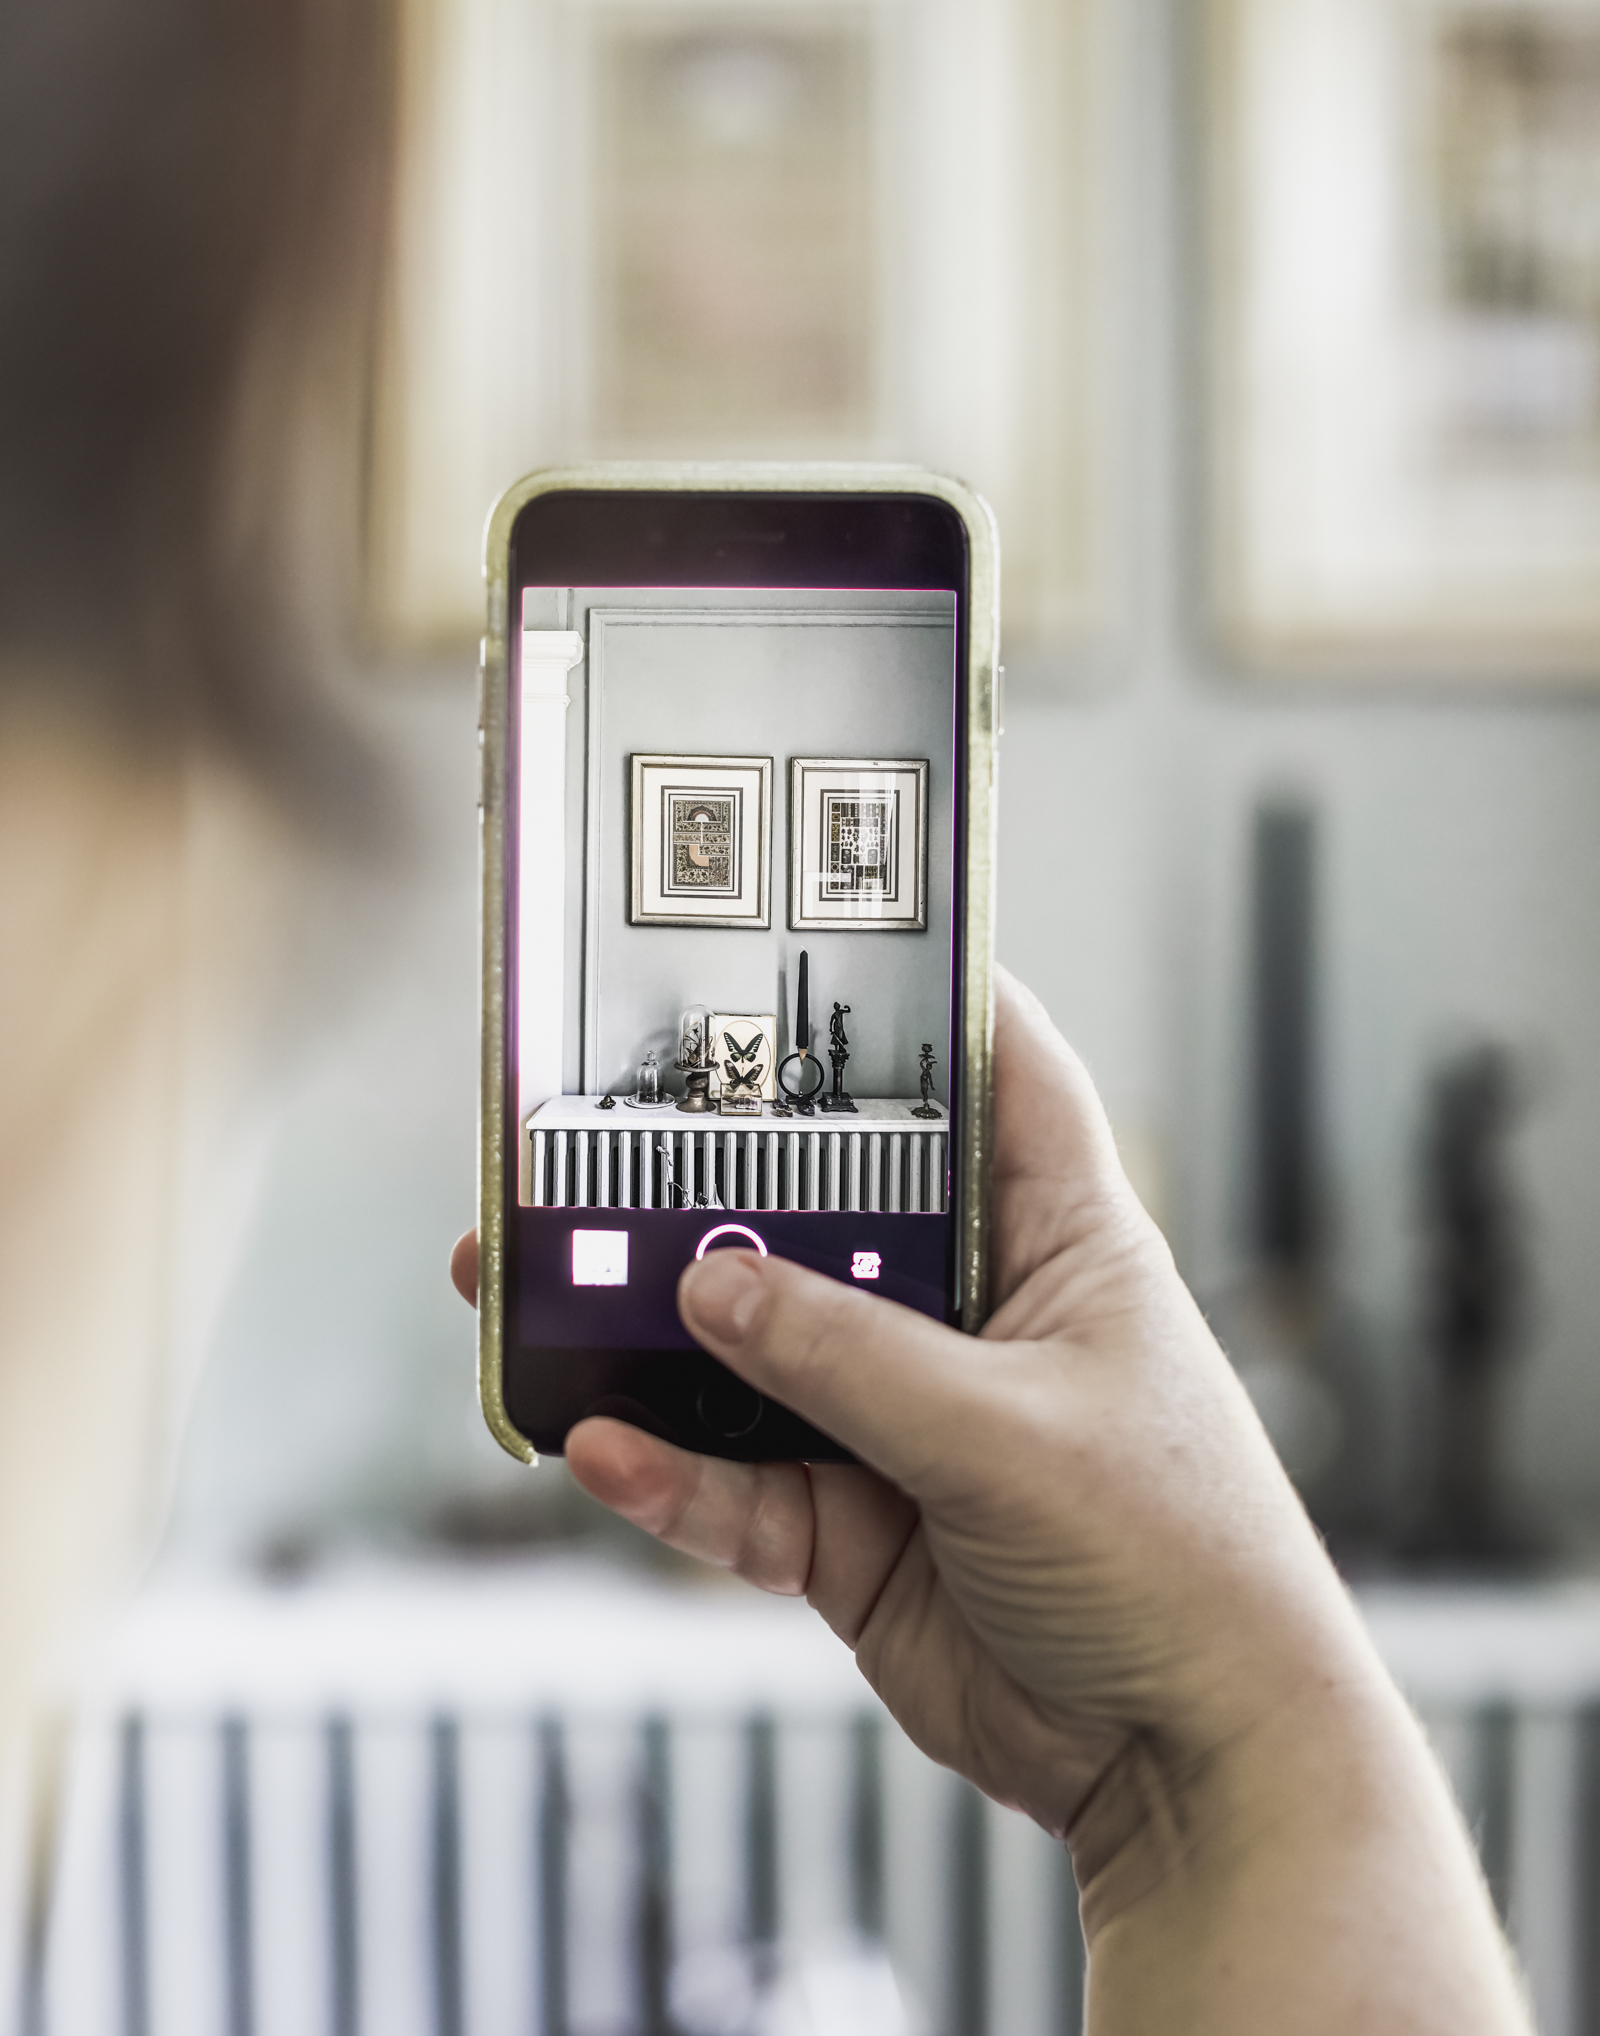
Frame up your hero moments and take a quick picture with your camera phone. Your camera phone (we like iPhones) has a wide angle lens and is great for shooting interiors. It’s what interior photographers use most of the time. I don’t fuss over details, don’t clean your house, just take a quick snap shot cause we’re going to analyze what’s working and what’s not.
The analyzation process is a creative exercise. I go back to the foundation of good design: balance, color, contrast, shapes, texture, etc. All those ideas will give me things to look for in my camera phone snapshots. Let’s look at some examples (use the slider under the image to see my comments and notes).
[baslider name=”LRRadiator”]
[baslider name=”LRFireplace”]
[baslider name=”LRNook”]
[baslider name=”LRBarCorner”]
[baslider name=”LRBarHeadOn”]
[baslider name=”LRBlankNookWall”]
[baslider name=”LRSmallBlueSofa”]
Step Two: Problem Solving and List Making
I know where my issues are from the snapshots above, and now I have to come up with solutions to my problem areas. This is where I make a list of the items I think I’ll need to finish the space. This list doesn’t have to be the end all be all, in fact many times I’ll change my mind. Why the list works: it gettings your brain thinking of a solution to a problem area. You have to use your imagination and then can act on it. I’m going to concept the solution to my problem. Short on ideas? I hit a wall sometimes, so I revisit my Pinterest boards to see if I can include new ideas I pinned long ago.
Once I have concepts for all my problem areas, I act on it by making a shopping list. These are items I need to finish the space. I always start by shopping my own home. Don’t know about you but unlimited budgets is not part of my life. I can be really resourceful by reinventing and repurposing items from around our house.
Step Three: Styling the Space
You’ve made your list and done your shopping. Now it’s time to get down to business and style for the photo shoot.
- Treat your home like a photography set. Make a prop table so you can see all your choices.
- Have options. If you are shopping your own home, make sure you pull together more items than you actually need. When I’m styling, I’ll swap out and look at a few options, then see what makes sense. It’s personal choice.
- Pay attention to repeating themes, like color, texture and scale. It’s a good thing to note when gathering objects.
- Consider the meaning of each object and what you are saying about your home. Are you saying you are formal or casual, chill or full of energy? Check out this post if you want to refine your personal story.
It’s photo shoot time! Make sure everything is dusted, cords are tucked out of camera sight and you check the spacing of furniture and objects in camera. Things can get weird in camera. If you want to see the details of how we solve these issues, follow us on Instagram Stories.
This post is part of a series for our living room make over. If you’d like to see all the posts, visit this page.

A lot of home blogs talk about how to style your home for the camera. You talk about how to use your camera to style your home. This is way more helpful for those of us who just want a beautiful home. Thank you for that. Also, I don’t think I have ever looked at World of Interiors magazine. I will pick one up. However, at the risk of sounding cheesy, what you produce and share is my WOI. That sounds kinda like, “you complete me”. Not what I intended, but wanted you to know that what you do is lovely and is meaningful, inspirational and very helpful.
[…] friends Susan and William — the masterminds behind House of Brinson just posted an awesome post, Styling the Photo Perfect Home. Use the slider to see Susan’s notes about what she would change and how she analyzes her […]