DIY Linen Cross-Over Curtains
We have an old home with strange size windows. Each room we renovate is a full blow strategy session as to how we are going to conserve heat in the winter, block the sun in the summer, yet make something that is beautiful. Thank goodness my mom taught me how to sew, right? When I was a kid, my mom was the craft-momma. Always making something or having some project for us to do. I went though a full blown country craft phase making things like reindeer with cinnamon stick legs and stenciled art for family members. Let’s not forget the ‘stamped’ velvet blanket phase. I’ve refined my taste and realized I could make seemingly luxury items for my home. When I go on house tours and visit estate homes, the drapery is always crazy good. The drapery is detailed with beautiful fabrics. While I always get inspiration from visiting estate homes, I want to keep our home a little more casual because we’re in the country.
A quick mention of lined drapery
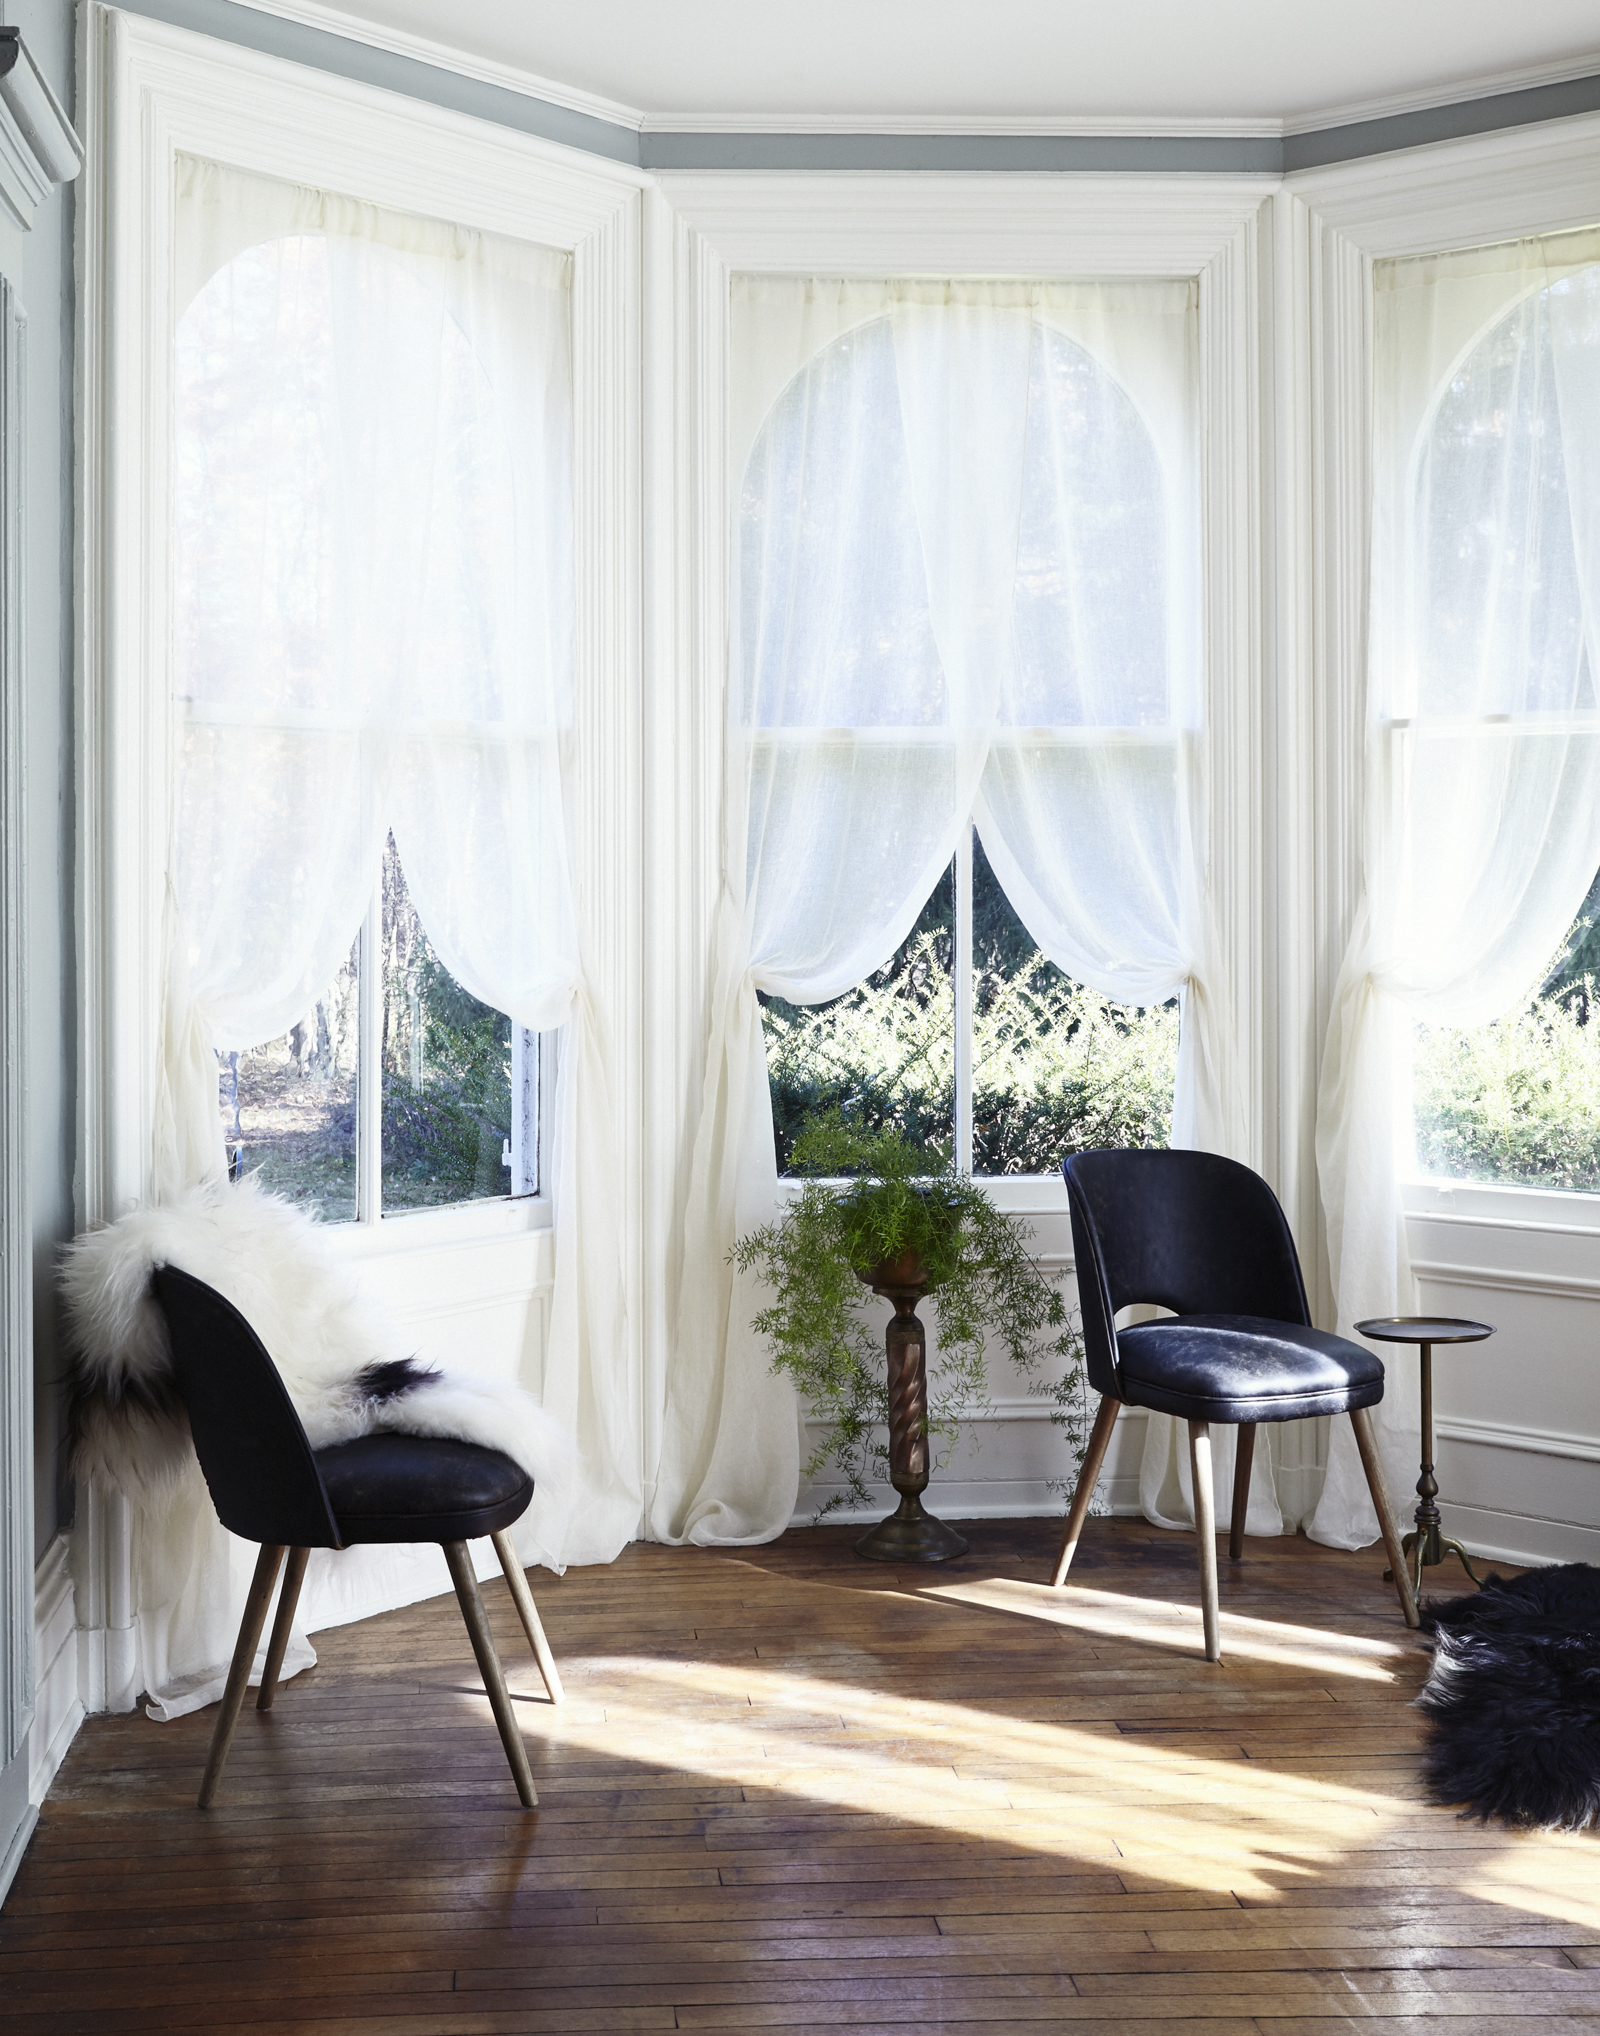
Last year I made lined drapery for the dining room. The motivation for sewing my own curtains and drapery is two fold: it’s less expensive than paying for custom and I can customize the look of the room. The living room has NINE windows! Six of the nine windows will use this cross over style of curtains while the remaining three windows will use lined drapes. (Same style of lined drapery in the dining room I made last year.) The drapes will cover three windows where we have terrible drafts, so I’ll use a heavy fabric (from Luru Home) and line them. I used this tutorial on Design*Sponge to make the lined drape. While I found it pretty easy, it took a bit of research for the supplies and to figure out how to cut the large panels and align the pattern. My friend Tiz helped and taught me a secret that I use for every sewing project I’ve done since.
Below you’ll find the pattern or as I like to think if it, my ‘formula’ for cross-over drapery. I’m assuming a few things: you have basic sewing skills and know how to use your sewing machine. I recently got a new sewing machine and I didn’t really know how to use it. This project forced me to learn more about my machine! To complement the gauzy linen fabric, I used a rolled hem which required more than a straight stitch. After watching a few You Tube videos and asking my Mom, I figured it out. So let’s get to it, instructions below!
Cross-Over Curtains
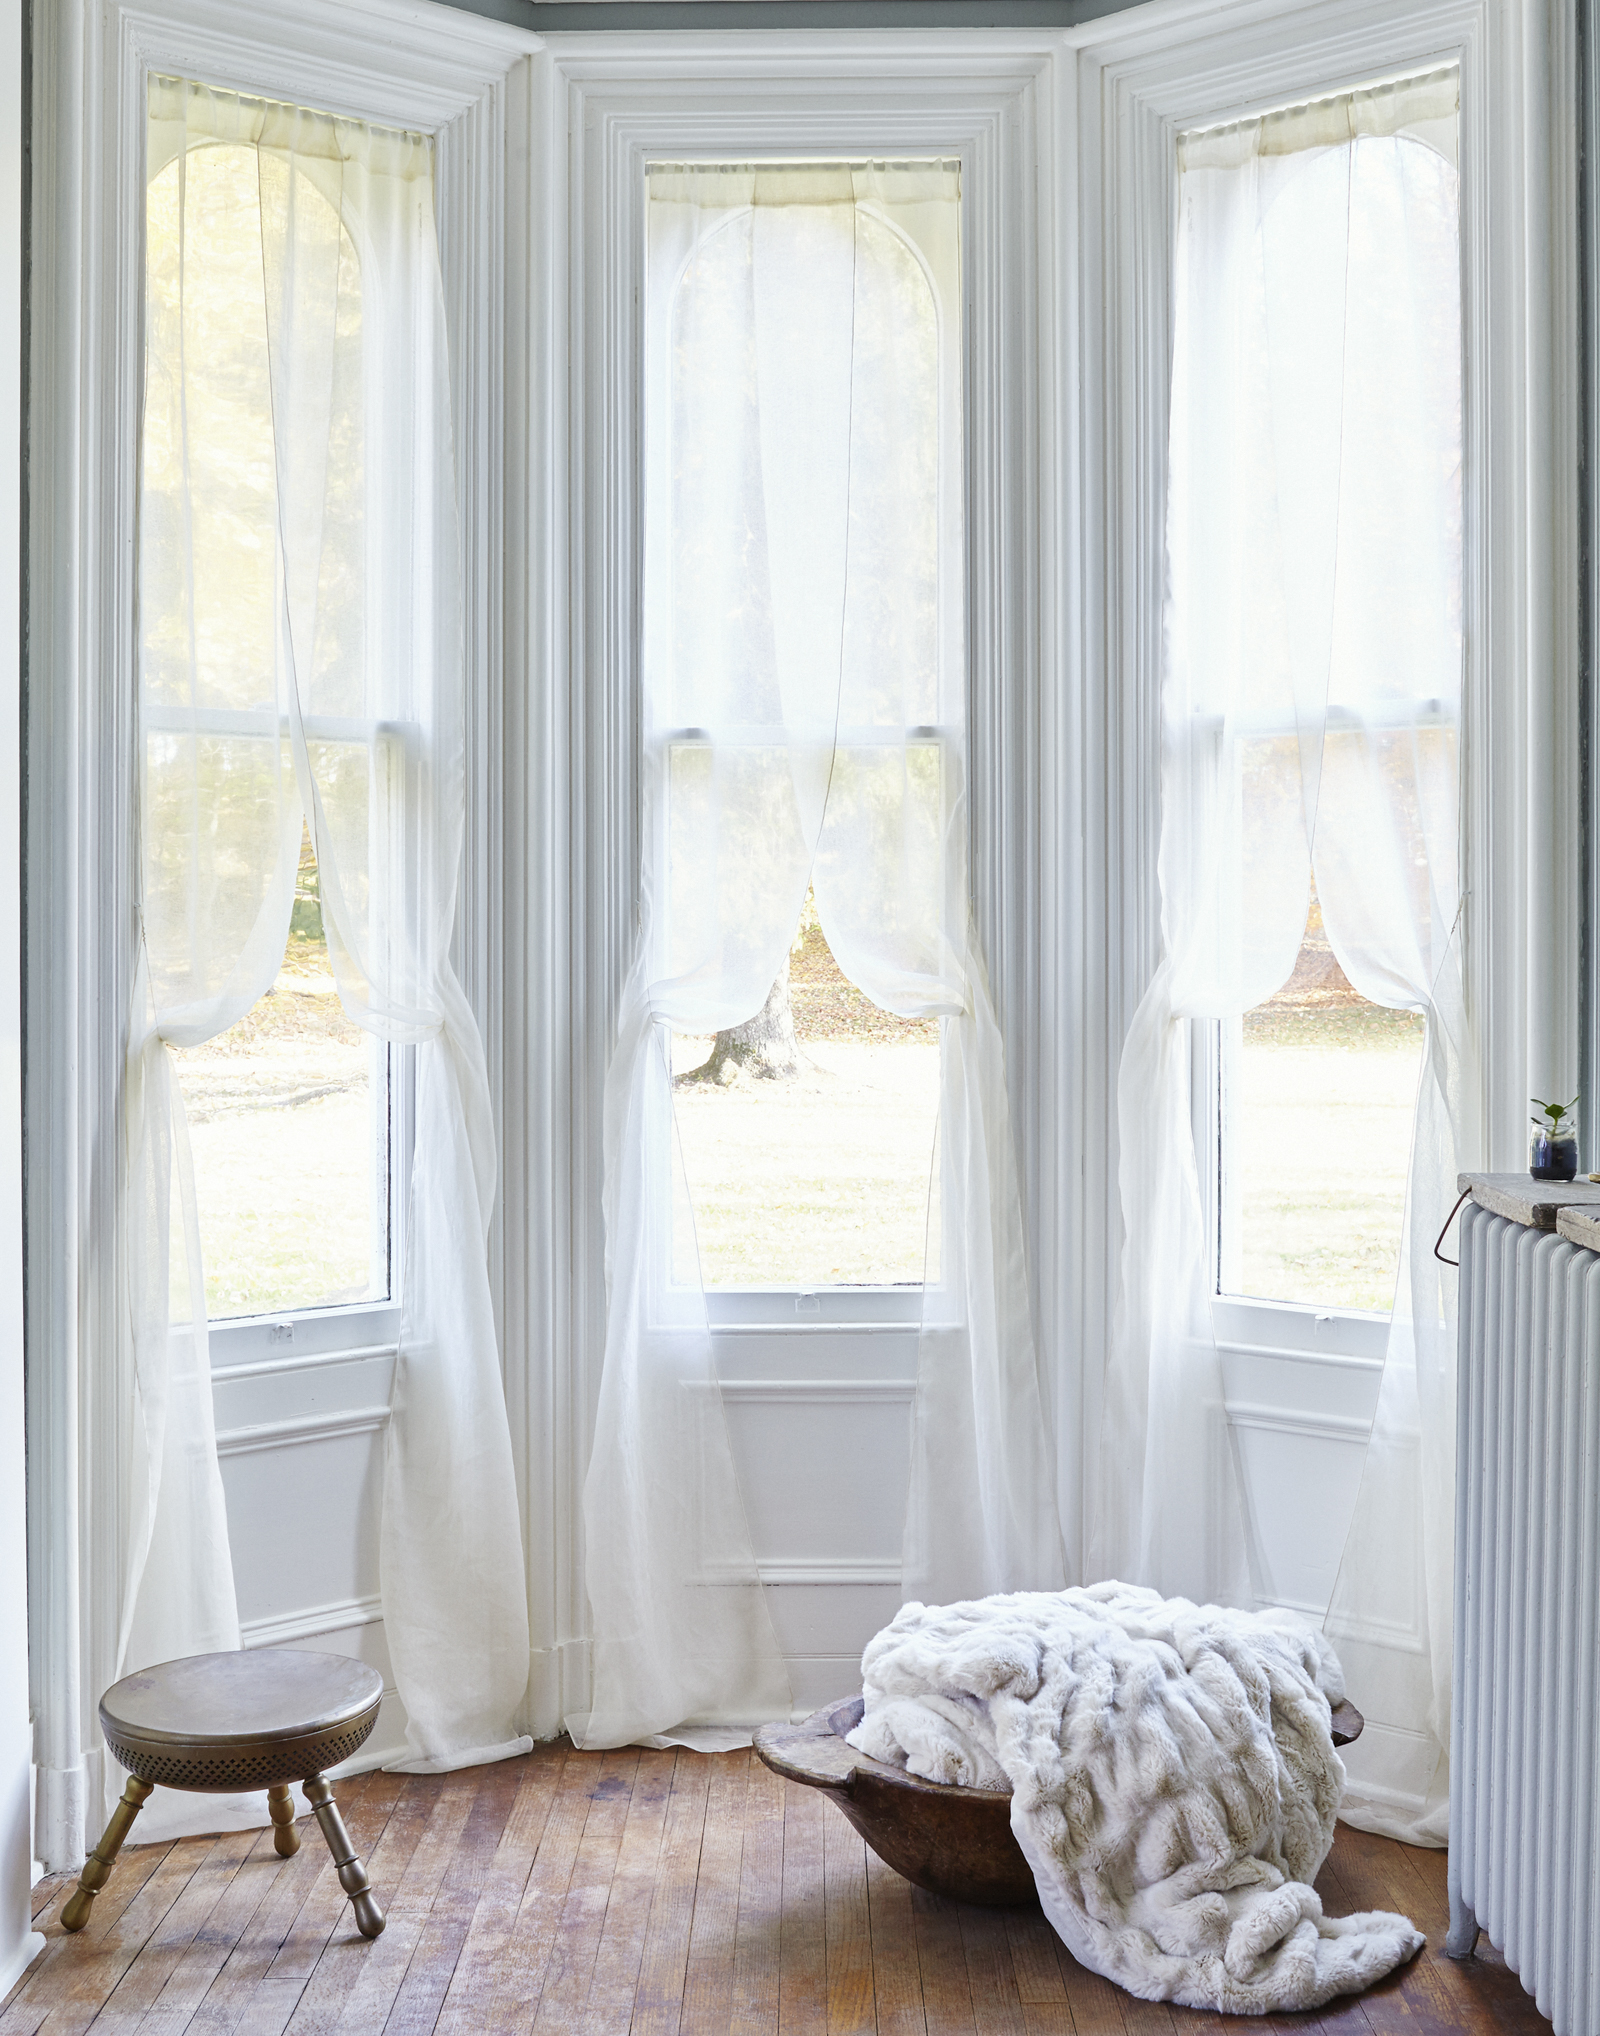
- Decide on your fabric. I went with a gauzy linen from Grey Line Linen. My hands down favorite place to buy linen. Their prices and quality are unbeatable (plus they’re really nice!). I went with a really light weight linen because I wanted you to see through the cross-over feature of the curtain, and I wanted the arch of the window to still be visible from the inside. This was really important to me cause why bother living in a home with beautiful architecture if we can’t see it?
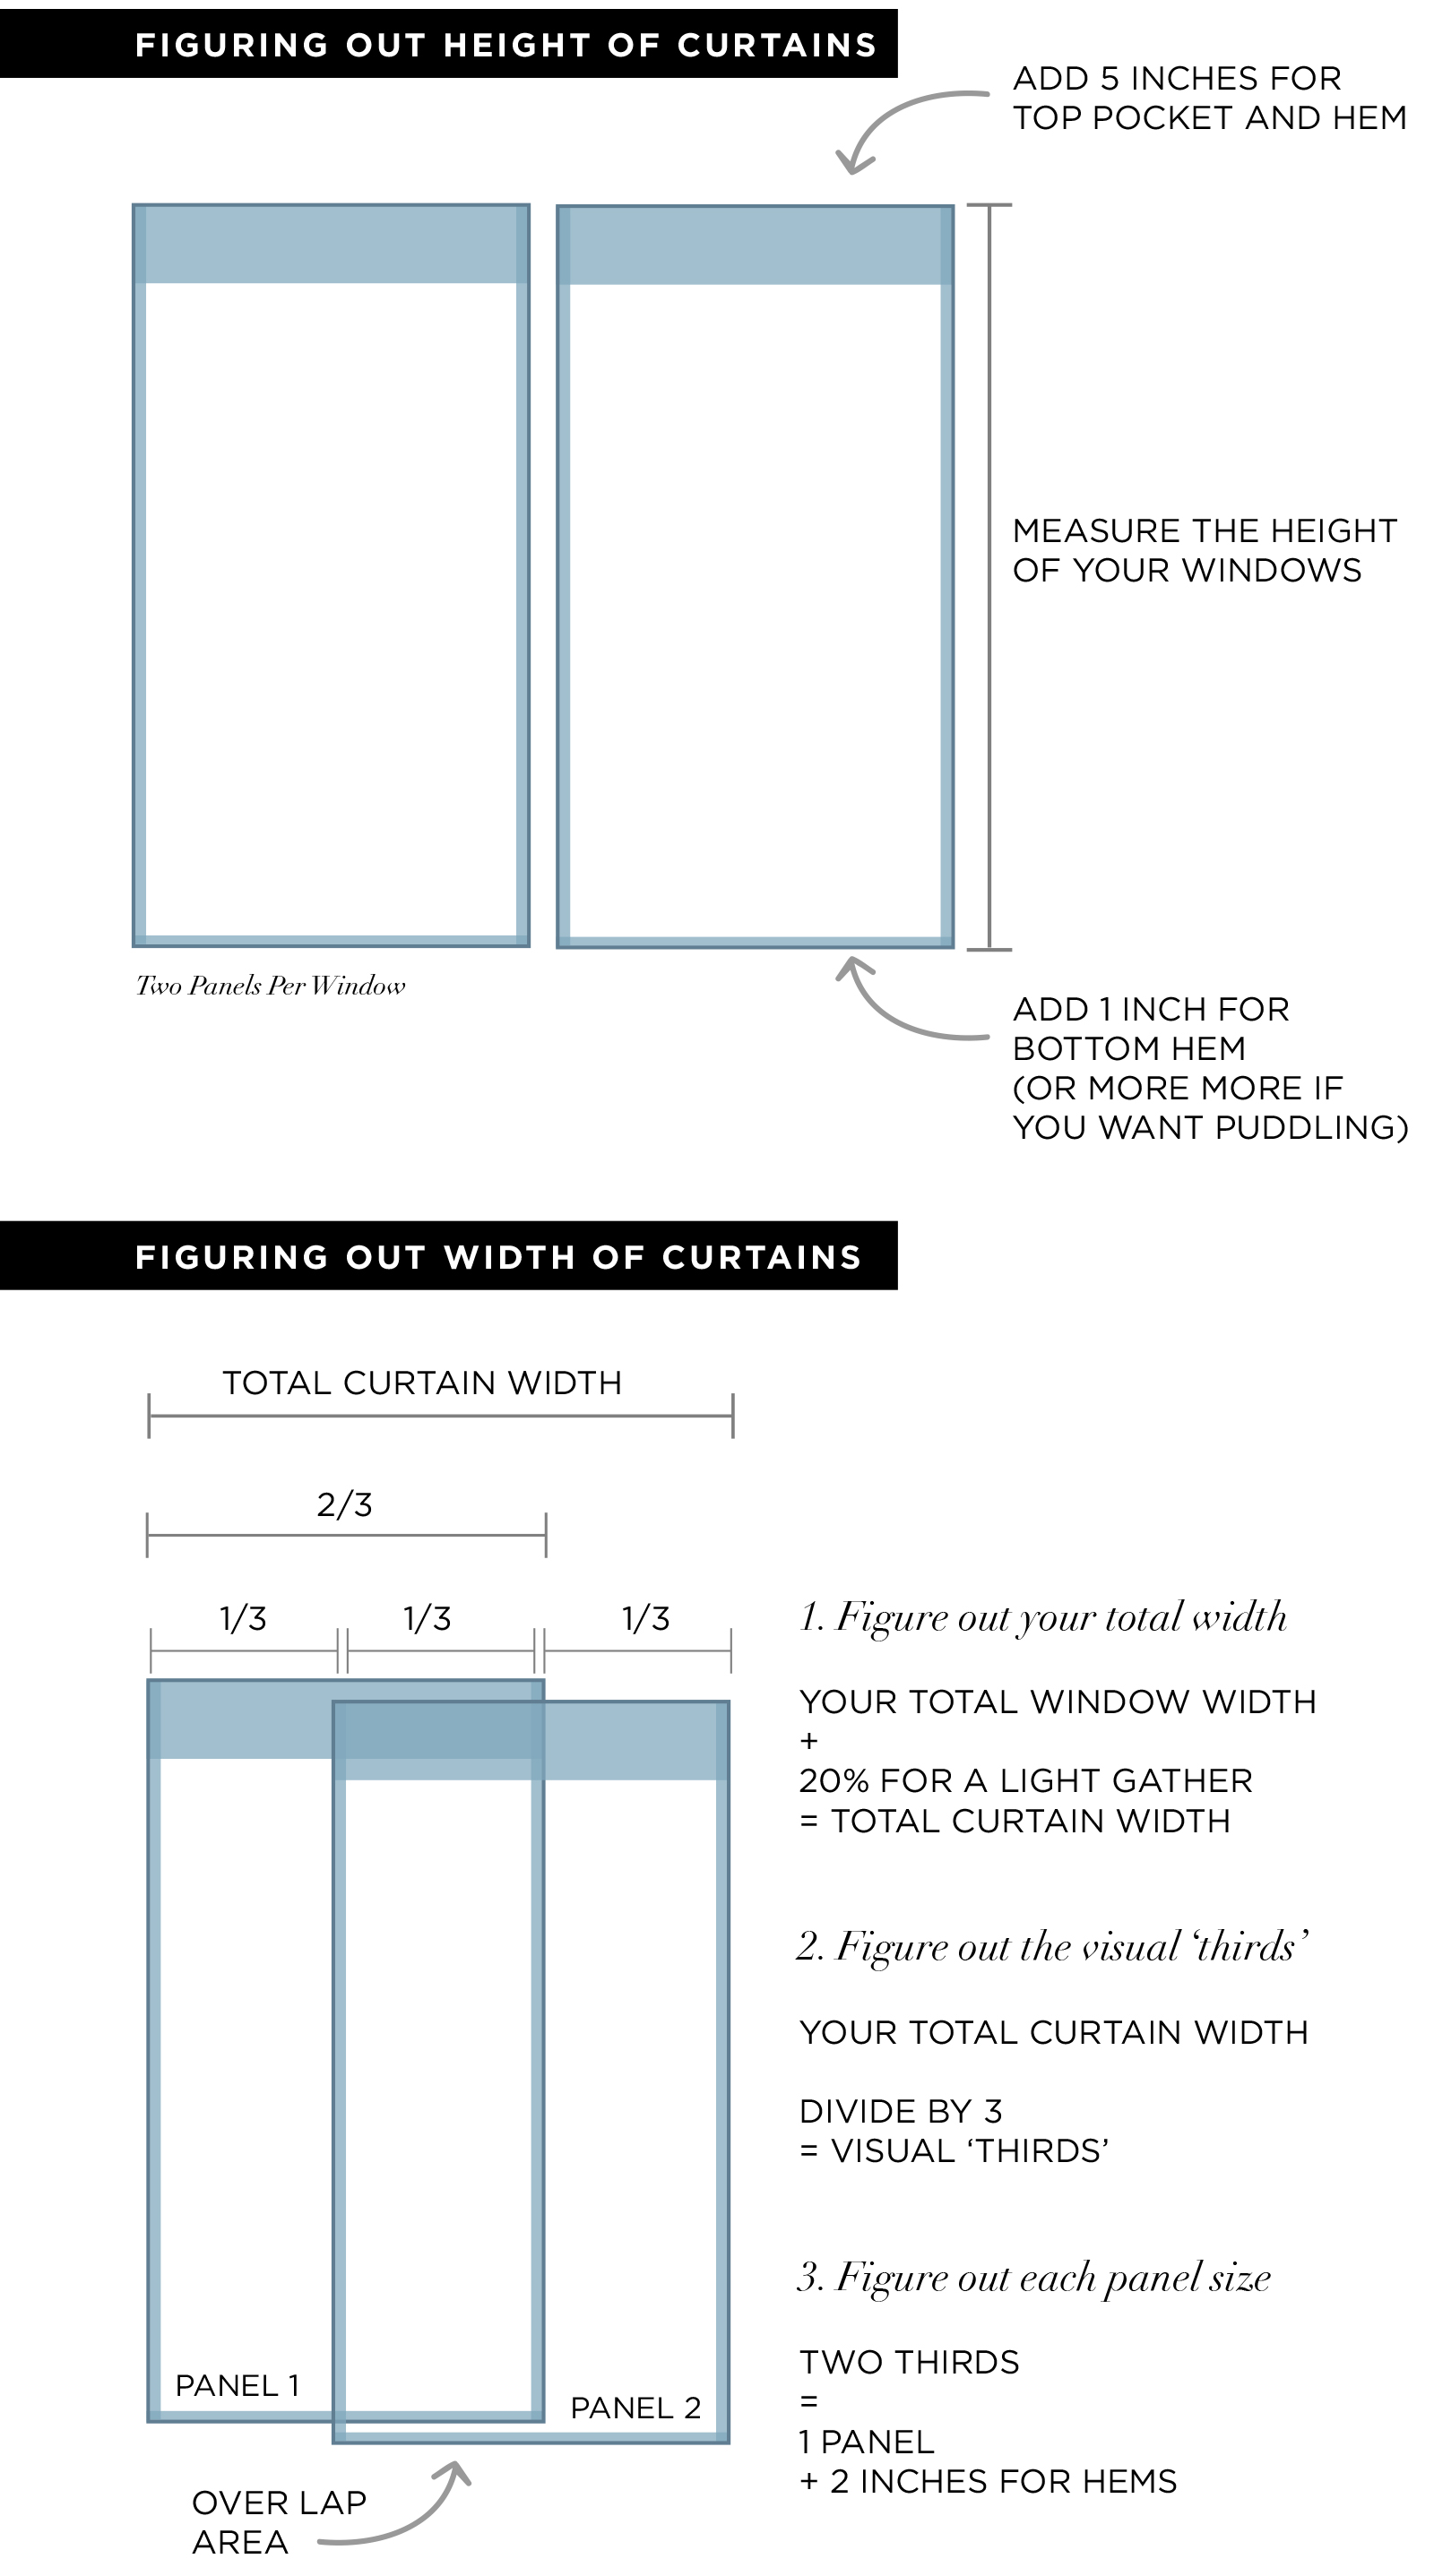
- Figure out your measurements. This will help you calculate how much fabric to buy.
- Wash Fabric, if necessary. I hand washed my fabric prior to sewing because there is always a bit of shrinkage. A little cold water and gentle detergent, then hang to dry. If you are using a dry clean only fabric, skip this step.
- Cut fabric panels. My friend Tiz showed me how to pin fabric to a board. I guess this is a pretty common thing in the sewing world, but I’m self taught so I’d never seen it! It’s quite genius. Get a huge piece of foam core and tack your fabric down with pins. Some seamstresses have padded tables, but if you want something you can put away, use foam core. You can then easily cut with no slipping, make marks on the board to align patterns, and pin measurements. If you’re not a maverick working with slippery fabric, this makes sewing so much easier.
- Begin sewing. I used a rolled hem for the sides and bottom because my fabric was so sheer and lightweight. A heavy hem would have taken away from the look of the finished curtain. I sewed in this order: both sides, top, lastly the bottom hem. Our floors are super crooked cause we have an old home, so I always hang the curtains and measure the bottom hem last. If you don’t have this issue, you could measure the length and sew the bottom the same time as the sides.

- One detail I added was a slightly rounded corner on the inner bottom hem. I cut these freehand or you can make a quick paper template. This makes a soft edge rather than a pointy square.
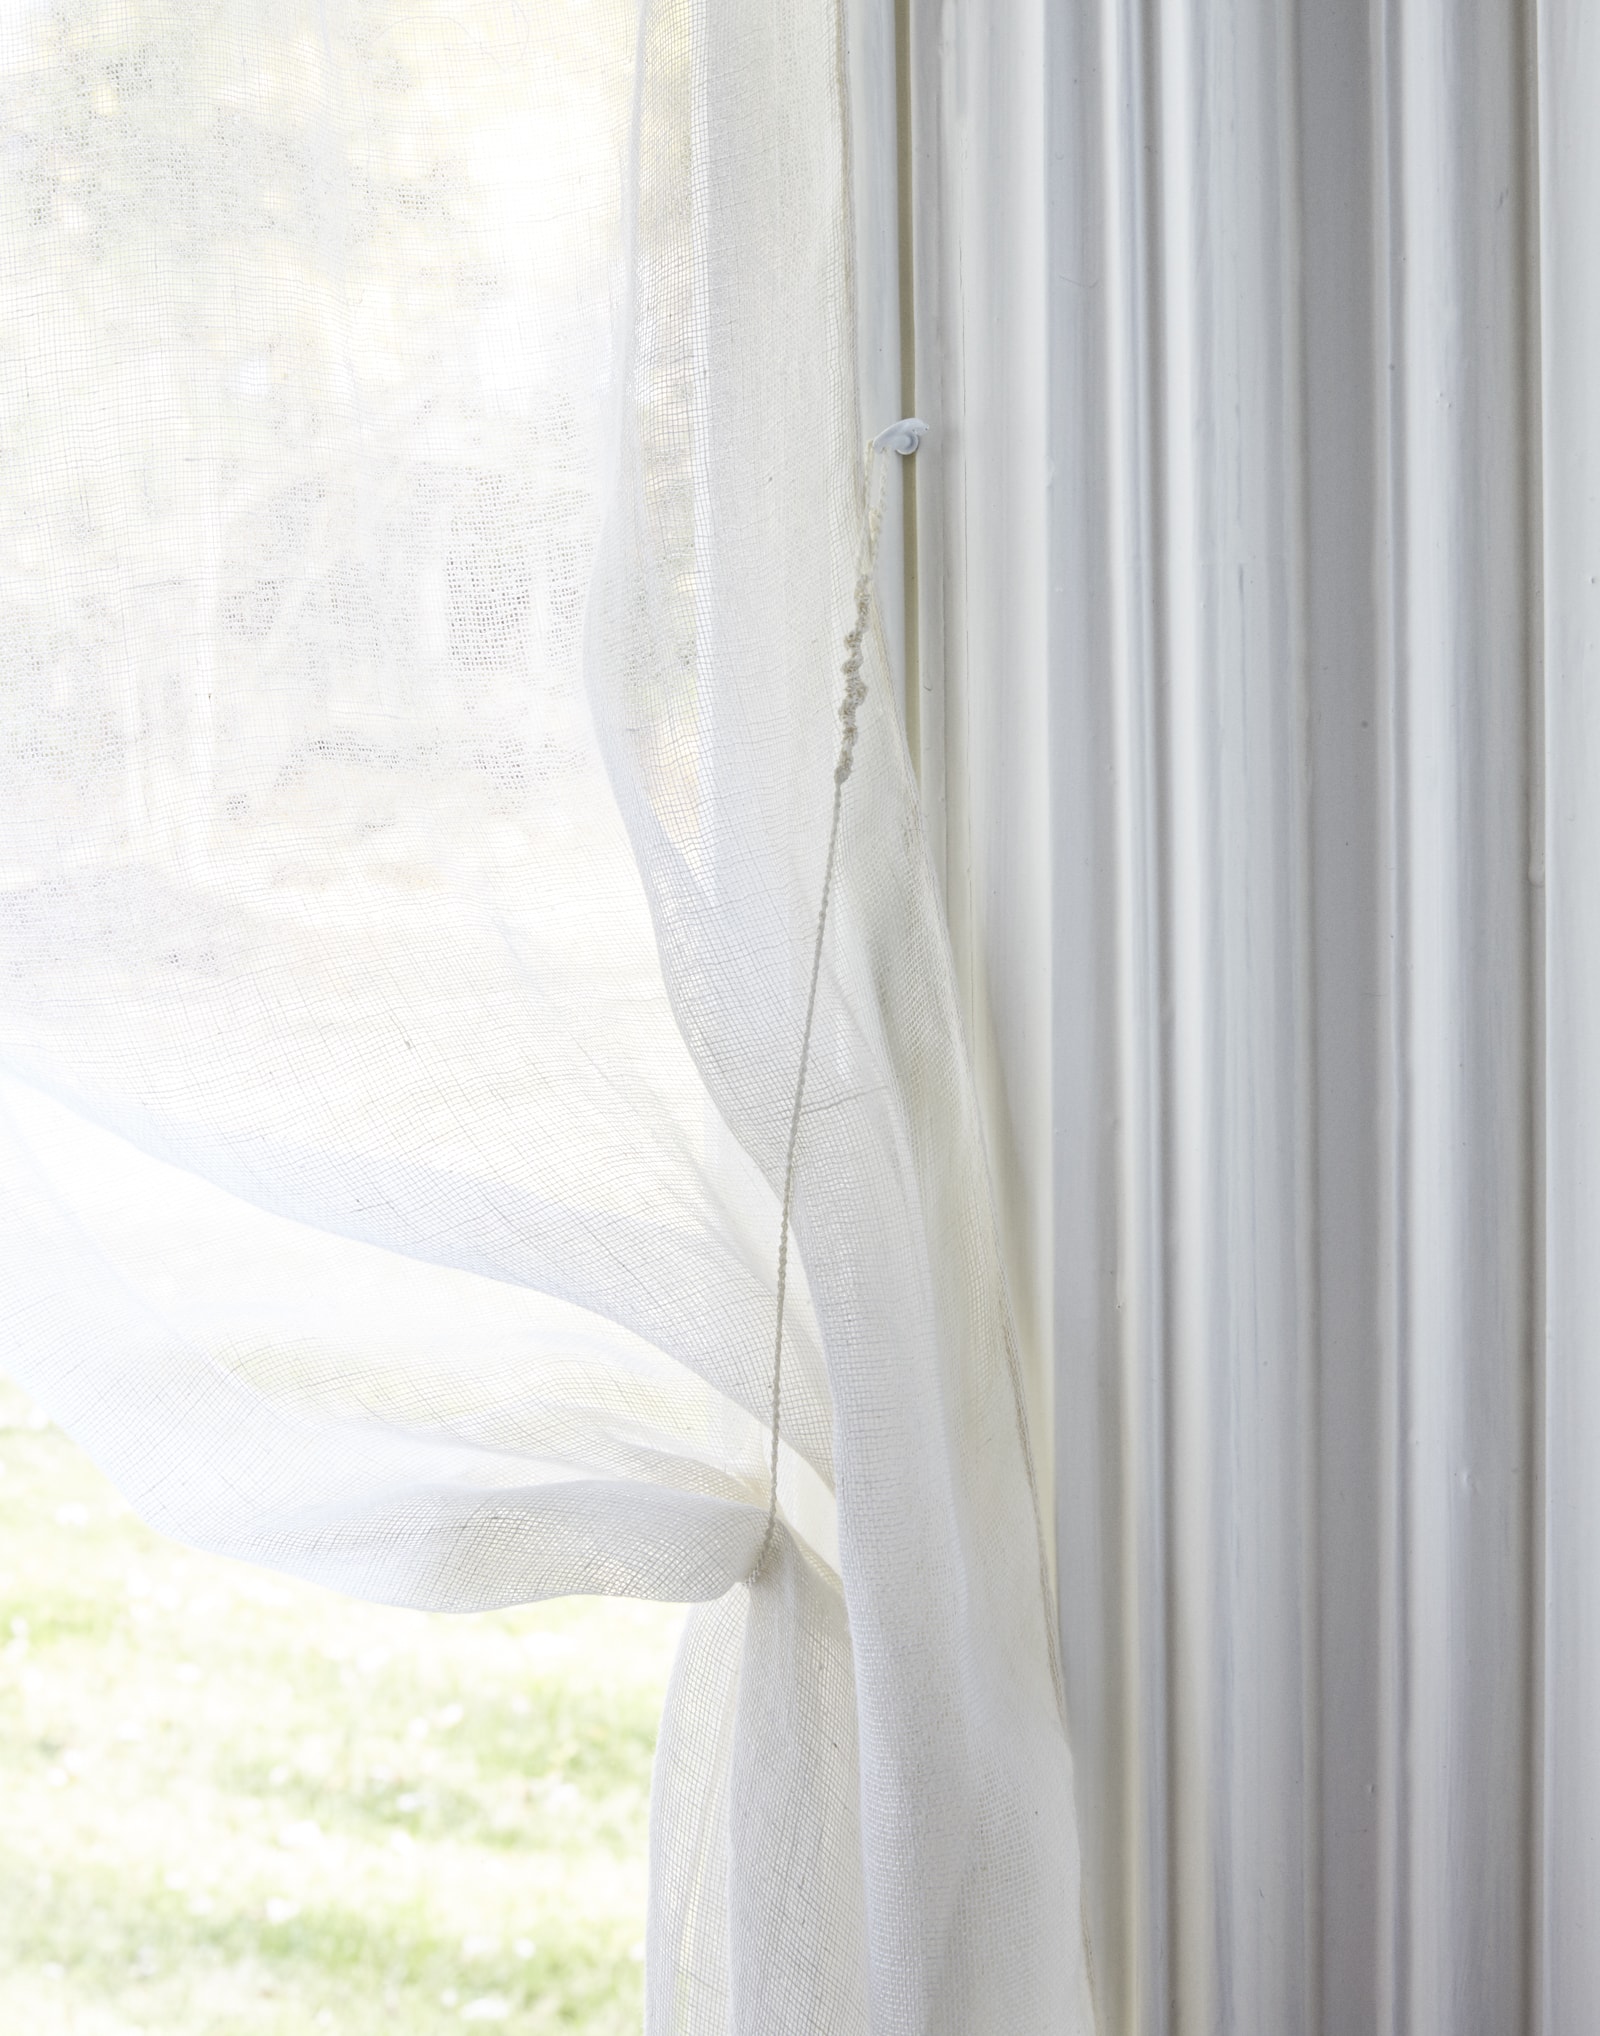
- I used tension rods to hang the curtains and made tie backs out of some heavy string that matched my fabric color. The tie backs shouldn’t be a design element, so they sit quietly without drawing attention. The style of curtain depends on the tie back type.
- Steam out wrinkles and style how the curtain.
More posts about renovating and decorating the living room.

Love this. Did you use 2 tension rods per window? I can’t figure out how you got the panels to overlap by using just 1?
I only used one tension rod. 🙂 I overlapped the pieces of fabric and sewed them together, so it’s the one pocket across the top. If you’re on Instagram and send me a DM, I’ll send you a video back showing you the stitch! If you use two tension rods, you see half on one in the front, so I just sewed my two panels together to create one pocket. Hope this helps! 🙂
I believe these are called “Priscilla” curtains. I love them.
This is what I have been picturing for my dining room! Can you also send me a video or a close up picture of the overlap? I have been having a touch time figuring our how to do so!
Thank you!
Kelly
I DMed you on Instagram! Hopefully that helps. 🙂
I would love to have the video as well if you can. Thx